
Is your Keurig acting up, leaving you with weak coffee or even no coffee at all? Over time, mineral deposits and debris can accumulate inside the machine, causing clogs that hinder its performance. Don’t fret, because we’ve got you covered with this step-by-step guide on how to unclog a Keurig.
How To Know Your Keurig Is Clogged?
You can judge from the following phenomena:
- Slow brewing or no brewing at all: If your Keurig takes longer than usual to brew a cup of coffee or doesn’t brew at all, it could be a sign of a clog.
- Inconsistent water flow: If you notice that the water flow is weak or uneven during brewing, it may indicate a clog.
- Unusual noises: A clogged Keurig may produce unusual noises, such as gurgling or hissing sounds.
- Error messages: Some Keurig models have error messages that appear when there is a clog. Check the user manual or Keurig’s website for specific error code meanings.
Why Unclog Keurig Brewers?
A clogged Keurig can lead to slower brewing times, inconsistent water flow, and poor coffee quality. By unclogging the machine, you can restore its optimal performance. Regular maintenance and unclogging can help prolong the life of your Keurig coffee maker. Clogs can put strain on the internal components and lead to premature wear and tear.
A clogged Keurig can harbor bacteria and mold growth. By keeping your machine clean and unclogged, you reduce the risk of contamination and ensure the safety of your brewed coffee.
How to Prevent a Clogged Keurig Brewer?
- Use filtered water: As mentioned earlier, using filtered water can help prevent mineral buildup and reduce the chances of clogs.
- Clean and descale regularly: Follow the manufacturer’s instructions for cleaning and descaling your Keurig machine. Regular maintenance will prevent the accumulation of coffee grounds and mineral deposits.
- Avoid leaving water in the reservoir: After each use, empty any remaining water from the water reservoir. Stagnant water can promote bacterial growth and contribute to clogs.
- Handle K-cups properly: Make sure to remove used K-cups promptly and dispose of them properly. Leaving them inside the machine can cause blockages.
- Store the machine properly: If you’re not using your Keurig for an extended period, make sure to clean it thoroughly and store it in a dry place to prevent dust and debris from entering the machine.
Points to Ponder Before Unclogging Keurig
- Read the user manual: Different Keurig models may have specific instructions for unclogging. Refer to the user manual for guidance on troubleshooting and unclogging methods.
- Try different solutions: There are several methods to unclog a Keurig, including using vinegar, paperclips, or commercial cleaning products. If one method doesn’t work, try another before giving up.
- Be patient and thorough: Unclogging a Keurig may take time and multiple attempts. Follow the instructions carefully and repeat the process if necessary.
- Seek professional help if needed: If all DIY methods fail to unclog your Keurig, consider contacting Keurig customer support or a professional appliance repair service for assistance.
How to Unclog a Keurig Coffee Maker
Timing Guide
| 2minutes | 10minutes | 10minutes | 22minutes |
Equipment
- Soft cloth or sponge
- Paperclip or needle
- Small brush (optional)
Materials
- Dish soap
- White vinegar
- Water
Instructions
Step 1: Unplug your Keurig Coffee Machine
Safety first! Start by unplugging your Keurig coffee machine from the power source. This will ensure that there is no electrical current running through the machine while you work on it.
Step2: Detach the Removable Parts of your Keurig
Remove the water reservoir, drip tray, and K-cup holder from your Keurig machine. These parts are usually detachable and can be easily removed for cleaning and unclogging purposes. Set them aside for now.
Step 3: Unclog the Needles
The needles in your Keurig can get clogged with coffee grounds and mineral deposits over time. To unclog them, take a paperclip or needle and carefully insert it into the needle openings, located in the K-cup holder area. Gently move the paperclip or needle around to dislodge any debris that may be causing the clog. Be cautious not to push too hard or damage the needles.
Step 4: Reassemble your Keurig
Once you have successfully unclogged the needles, reassemble your Keurig by placing the water reservoir, drip tray, and K-cup holder back into their respective positions. Ensure that they are properly aligned and securely attached.
Step 5: Run a Descaling Cycle
To further clean and remove any mineral buildup in your Keurig, run a descaling cycle using a mixture of white vinegar and water. Follow the manufacturer’s instructions for the correct vinegar-to-water ratio and pour the solution into the water reservoir. Place a large cup or container on the drip tray to catch the liquid.
Turn on your Keurig and initiate a brew cycle without inserting a K-cup. Allow the vinegar solution to run through the machine and into the cup/container. This process will help dissolve any remaining deposits and unclog the internal components of your Keurig.
Step 6: Brew a Cup!
After running the descaling cycle, rinse your Keurig thoroughly by running multiple cycles with fresh water. Fill the water reservoir with clean water and initiate several brew cycles without a K-cup. This will ensure that any remaining vinegar residue is flushed out.
Once you’ve completed the rinsing process, your Keurig should be unclogged and ready to brew a delicious cup of coffee! Enjoy the improved performance of your freshly cleaned and unclogged Keurig coffee maker.
Tips for Maintaining Your Keurig Coffee Maker
- Regularly clean and descale your Keurig machine to remove mineral buildup. Follow the manufacturer’s instructions for cleaning and descaling.
- Use filtered water instead of tap water to prevent mineral deposits from accumulating in the machine.
- Remove and clean the removable parts, such as the water reservoir, K-cup holder, and drip tray, regularly. These parts can accumulate coffee grounds and bacteria if not cleaned regularly.
- Avoid using harsh cleaning agents or abrasive materials on the machine as they can damage the internal components. Stick to mild dish soap and a soft cloth for cleaning.
- Keep the machine in a clean and dry area to prevent dust and moisture from affecting its performance.
FAQs
How often should I clean and descale my Keurig?
It is generally recommended to clean and descale your Keurig every 3 to 6 months, depending on your usage and the quality of your water. Regular cleaning helps maintain the performance of your machine and prevents clogs from occurring. If you notice any signs of reduced water flow or a change in taste of your brewed coffee, it’s a good indication that your Keurig needs cleaning.
Are there any specific cleaning products I should use for unclogging my Keurig?
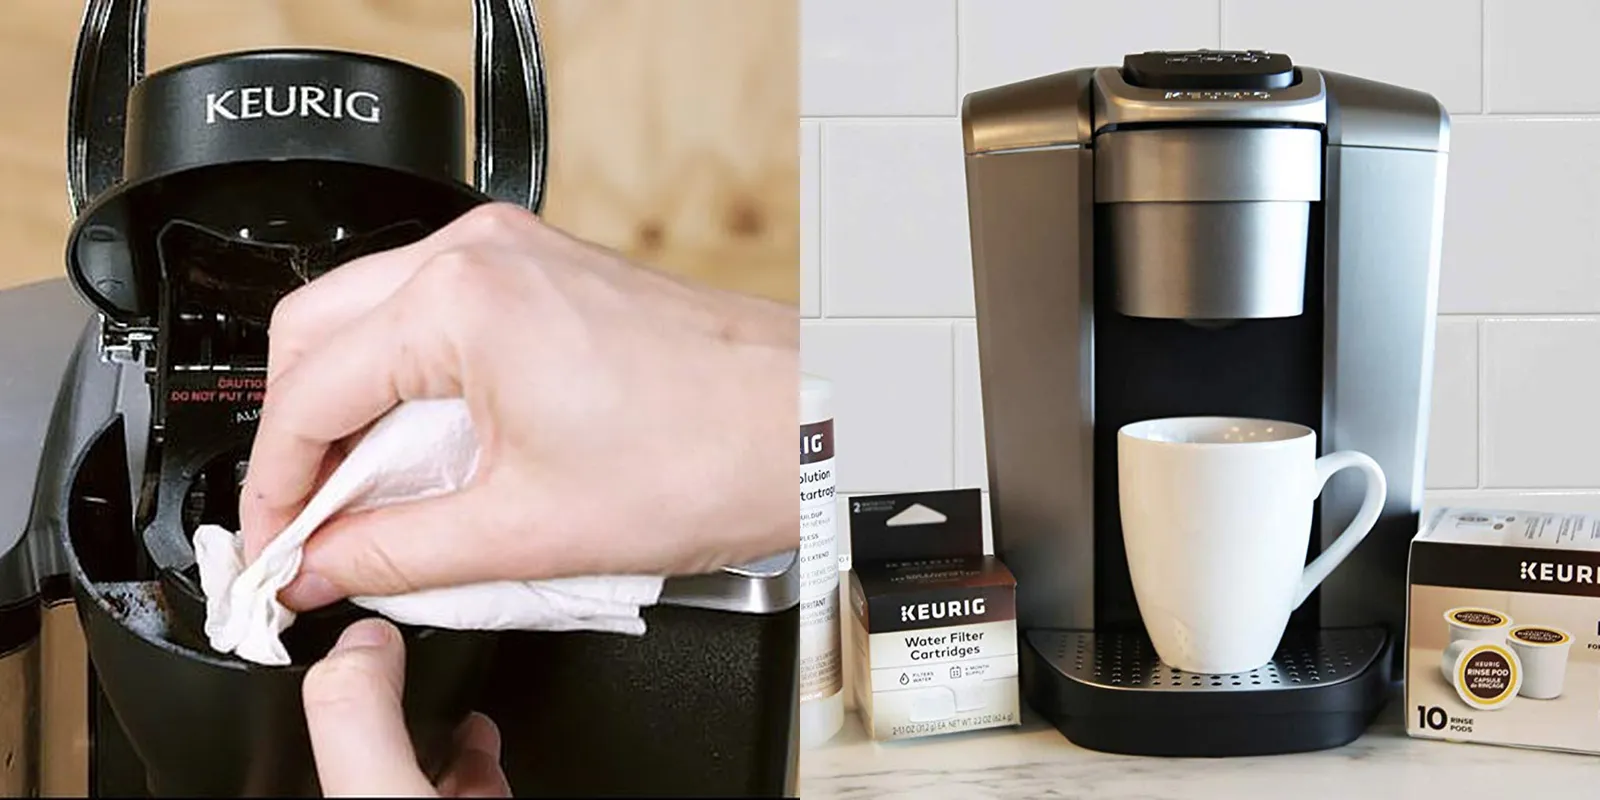
There are several cleaning products available specifically designed for unclogging Keurig machines. These include Keurig Descaling Solution, which helps remove mineral buildup, and Keurig Rinse Pods, which clean the needle that punctures the K-Cup. Using these products can effectively unclog your Keurig and keep it running smoothly.
Is vinegar an effective solution for unclogging a Keurig?
Yes, vinegar is a widely used and effective solution for unclogging a Keurig. The acidity of vinegar helps dissolve mineral deposits and scale that can accumulate inside the machine. To use vinegar, mix equal parts of white vinegar and water and run the solution through your Keurig as if you were brewing a regular cup of coffee. This process should help clear any clogs and improve the overall performance of your machine.
Can I use a paperclip to unclog my Keurig?
Using a paperclip can be an effective method for unclogging certain parts of your Keurig. For example, if the needle that punctures the K-Cup becomes clogged, you can carefully insert a unfolded paperclip into the needle to remove any debris. However, it’s important to exercise caution and follow the manufacturer’s guidelines when attempting this method to avoid damaging any internal components.
What should I do if the Keurig is still not working properly?
If you have exhausted all the unclogging methods and your Keurig is still not functioning properly, it may be necessary to seek professional assistance. Contact Keurig customer support or consult a technician who specializes in coffee machine repairs. They will have the expertise and tools required to diagnose and fix any underlying issues that may be affecting your Keurig’s performance.
Conclusion
Armed with these step-by-step instructions, you now have the tools and knowledge to tackle any clogs that may be plaguing your Keurig. Remember, regular maintenance and cleaning are key to preventing future issues and keeping your machine in top-notch condition. So don’t let a clogged Keurig ruin your coffee routine—follow this guide and get back to savoring every delicious cup of brew.