
Learning how to work a Keurig machine might appear overwhelming at first due to its various components and features. However, fear not! In this comprehensive guide, we will walk you through everything you need to know about how to work a Keurig, ensuring that you can brew your favorite cup of joe hassle-free and enjoy the convenience it offers.
How to work a Keurig Coffee Maker
1. Double Check It’s Turned On
Before using your Keurig coffee maker, make sure it is turned on. Look for the power button or switch on the machine and ensure that it is in the “on” position. This step is essential to ensure that the machine functions properly and will start the brewing process.
2. Fill the Reservoir
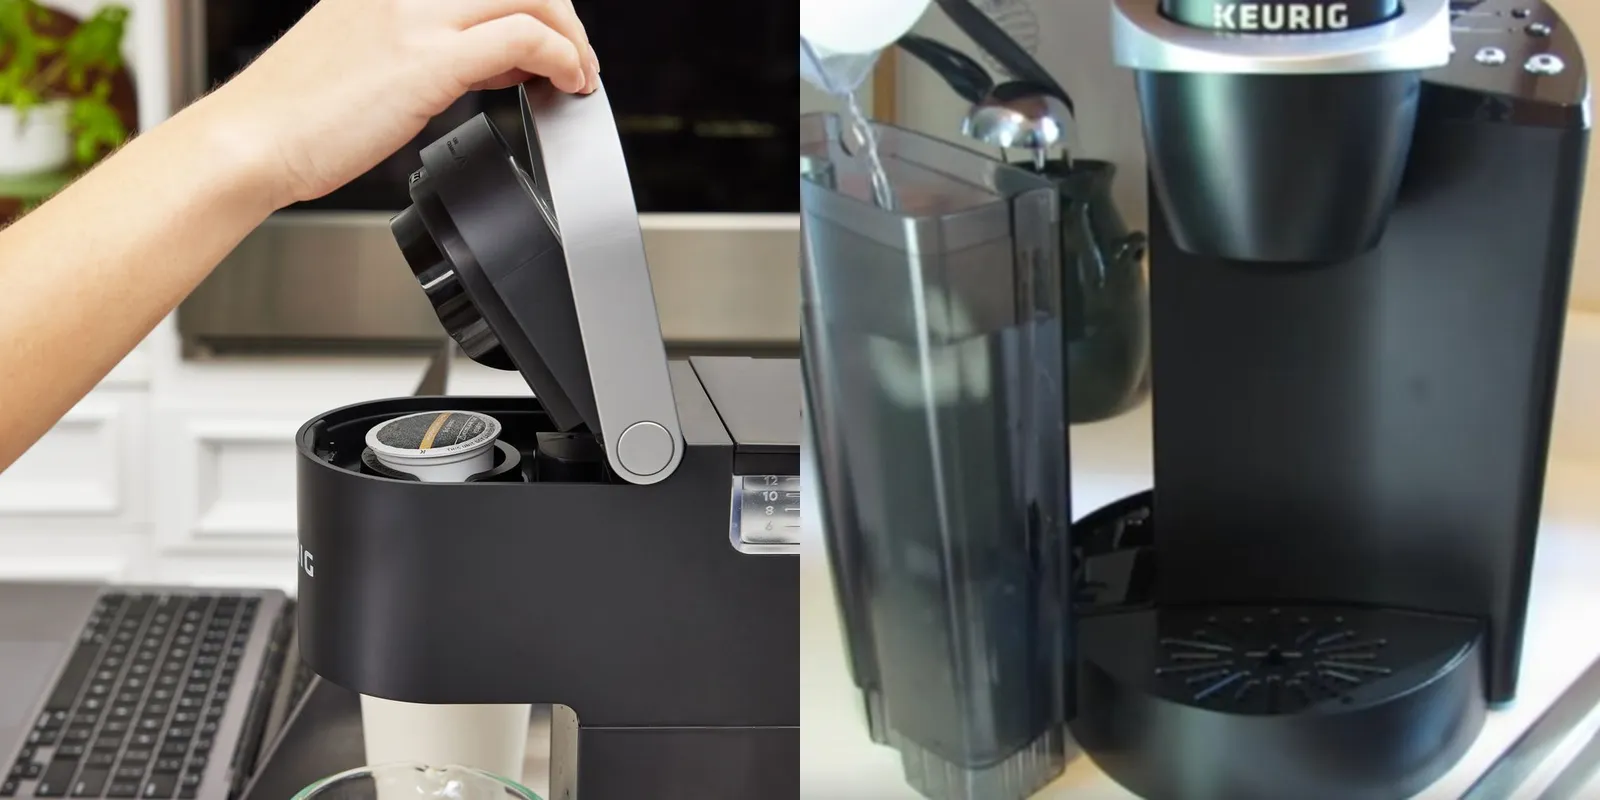
Next, locate the water reservoir on your Keurig coffee maker. This is typically located at the back or side of the machine. Lift the lid or flap to open the reservoir and fill it with clean, cold water. Be sure not to overfill the reservoir, as this can lead to spills and make a mess. Close the reservoir lid securely after filling it.
3. Choose Your Coffee
Before inserting a K-cup into the machine, decide on the type and flavor of coffee you want to brew. Keurig machines offer a wide variety of K-cup options, including different coffee blends, tea, hot cocoa, and more. Select the K-cup that suits your taste preferences and mood for the day.
4. Insert the K-cup into the Machine
Once you have chosen your desired K-cup, lift the handle of the Keurig coffee maker to open the compartment where the K-cup is inserted. Place the K-cup into the compartment, ensuring that it is aligned correctly with the puncture needle at the bottom. Close the handle back down until it clicks into place, securing the K-cup inside the machine.
5. Place Your Coffee Mug on the Tray at the Bottom Center of the Machine
Take your coffee mug and place it on the drip tray located at the bottom center of the Keurig coffee maker. Ensure that the mug is large enough to hold your desired amount of coffee and that it is positioned directly below the dispenser spout. This will prevent any spills or splattering while the coffee is being brewed.
6. Choose Your Mug Size
Most Keurig coffee makers offer multiple mug size options, allowing you to brew different amounts of coffee based on your preferences. Look for buttons or a touch screen display on the machine that indicates the available mug size settings. Select the appropriate size for your coffee by pressing the corresponding button or touching the screen.
7. Remove the Used K-Cup
After enjoying your cup of coffee, it’s important to remove the used K-cup from the machine. Lift the handle of the Keurig coffee maker to open the compartment and carefully remove the used K-cup. Dispose of it properly and ensure that the compartment is empty before brewing another cup of coffee.
How to Use a Keurig for Brewing & Daily Use
1. Choose your pod and grab a mug
To begin using your Keurig for brewing and daily use, select the pod or K-cup that you want to brew. Keurig offers a wide range of flavors and coffee options to suit every taste. Grab a clean mug to hold your coffee once brewed.
2. Lift the handle, insert the pod and lower the handle
Place your chosen pod into the pod holder by lifting the handle and inserting the pod. Ensure that the pod is aligned properly with the puncture needle at the bottom. Lower the handle back down until it clicks into place, securing the pod inside the machine.
3. Select the desired settings for your brew
Take a look at the display panel or buttons on your Keurig machine to select your desired brew settings. This may include options such as brew strength, temperature, and cup size. Adjust these settings according to your personal preferences.
4. Press BREW and wait for your coffee to finish
Once you have set the desired brew settings, press the BREW button to begin the brewing process. The machine will start brewing your coffee, and you can sit back and wait for it to finish. The brewing time will vary depending on the machine and the selected brew settings.
5. Enjoy!
Once the Keurig has finished brewing your coffee, carefully remove the mug from the tray and enjoy your freshly brewed cup of coffee. Take a moment to savor the aroma and taste, and start your day off right with a delicious and convenient cup of coffee.
Auto-On & Auto-Brew Modes
1. Choose your K-carafe pod and insert your carafe
If you own a Keurig machine equipped with the K-carafe feature, start by selecting a K-carafe pod and insert it into the designated pod holder. Then, place your carafe under the dispenser spout to prepare for brewing a larger quantity of coffee.
2. Lift the handle, insert the pod and lower the handle
Just like with the regular K-cups, lift the handle of the Keurig machine and insert the K-carafe pod into the pod holder. Ensure that the pod is properly aligned with the puncture needle at the bottom. Lower the handle until it clicks into place, securing the pod.
3. Choose the brew size and select AUTO BREW setting
Take a look at the machine’s control panel and select the desired brew size for your K-carafe. This typically ranges from small pots to larger carafes. After choosing the brew size, locate the AUTO BREW setting on the machine and select it to enable automatic brewing.
4. Select the brew time you want
If your Keurig machine offers the option to program the brew time, take advantage of this feature. Set the desired brew time for your coffee to automatically start brewing at a specific time. This is particularly useful if you want your coffee ready when you wake up in the morning or after returning home from work.
5. Wait
Once the auto-brew mode is set up, all you have to do is wait for the predetermined brew time. The Keurig machine will automatically start brewing your coffee at the specified time, freeing up your hands and saving you precious time.
6. Optional: To edit or cancel the brew
In the event that you need to edit or cancel the auto-brew setting, familiarize yourself with the instructions specific to your Keurig machine. This may involve navigating through the control panel or pressing certain buttons to adjust the settings. Make any necessary changes or cancel the brew altogether according to your preferences.
Keurig Regular Maintenance Tips
Regular maintenance is essential to keep your Keurig coffee maker in optimal condition. Here are some tips to help you maintain your Keurig machine:
- Descaling: Over time, mineral deposits can build up inside your Keurig coffee maker, affecting its performance. Descaling is necessary to remove these deposits and ensure proper functioning. Follow the manufacturer’s instructions that come with your machine to descale it regularly. Typically, a descaling solution or a mixture of vinegar and water is used to clean the internal components.
- Cleaning the water reservoir and lid: The water reservoir should be cleaned periodically to remove any residue that may accumulate. Remove the water reservoir and lid, wash them with warm soapy water, and rinse thoroughly. Ensuring the cleanliness of these components prevents any unpleasant odors or tastes from transferring to your coffee.
- Cleaning the K-Cup holder and needle: The K-Cup holder and needle can become clogged with coffee grounds or debris. To clean them, remove the K-Cup holder, disassemble it, and wash all the removable parts with warm soapy water. Use a small brush or a paperclip to clean the needle carefully. Rinse everything thoroughly before reassembling.
- Wiping the exterior: Regularly wiping the exterior of your Keurig coffee maker with a damp cloth helps maintain its appearance and prevents the buildup of dust and dirt.
Do Keurig Coffee Maker Instructions Differ by Model?
Yes, Keurig coffee maker instructions can vary slightly depending on the model, as different models may have different features and functionalities. While the overall brewing process remains similar across Keurig machines, there might be specific instructions or additional steps for certain models.
It is essential to consult the instruction manual provided with your specific Keurig model to ensure you are following the correct guidelines. Keurig provides detailed instructions in their manuals, including how to operate the machine, specific button functions, and maintenance instructions.
Conclusion
By following this comprehensive guide, you are now well-equipped with the knowledge needed to successfully work a Keurig coffee maker. Remember, practice makes perfect! As you become more acquainted with your machine, don’t be afraid to experiment with different coffee flavors, brew sizes, and settings until you find your perfect cup of coffee.