
Keurig needle replacement is an important part of keeping your Keurig coffee maker functioning properly. Frequently replacing the Keurig needle is necessary to ensure that the coffee grounds are properly extracted from the K-Cup, resulting in a flavorful and consistent cup of coffee. This guide will provide an overview of the Keurig needle replacement process, as well as where to buy the parts needed.
Keurig Needle Replacement Guide
Replacing Signs
- Slow or inconsistent brewing: If it’s taking longer than usual for your K-Cup to brew or the amount of water used is different each time, it could be a sign that the needle is clogged or damaged and needs to be replaced.
- Leaking machine: Check the bottom of your Keurig for any water leaks. If you find any, this could be a result of a damaged needle that is causing the water to escape the K-Cup.
- Odd tasting coffee: If your coffee has a metallic or plastic taste, it could be a sign that the needle is damaged or dirty. It’s essential to replace it to ensure that you’re brewing coffee correctly.
- Visible damage: Check the needle to see if there are any visible damages, such as rust or bends. Any minor or major damage can cause it to malfunction, leading to the symptoms mentioned above.
- Maintenance reminder: If your keurig has a descale or needle replacement reminder light, make sure to follow it, even if you don’t notice any visible damages or malfunctions. The reminder is set by the manufacturer to ensure the machine functions to its best capacity.
Preparation
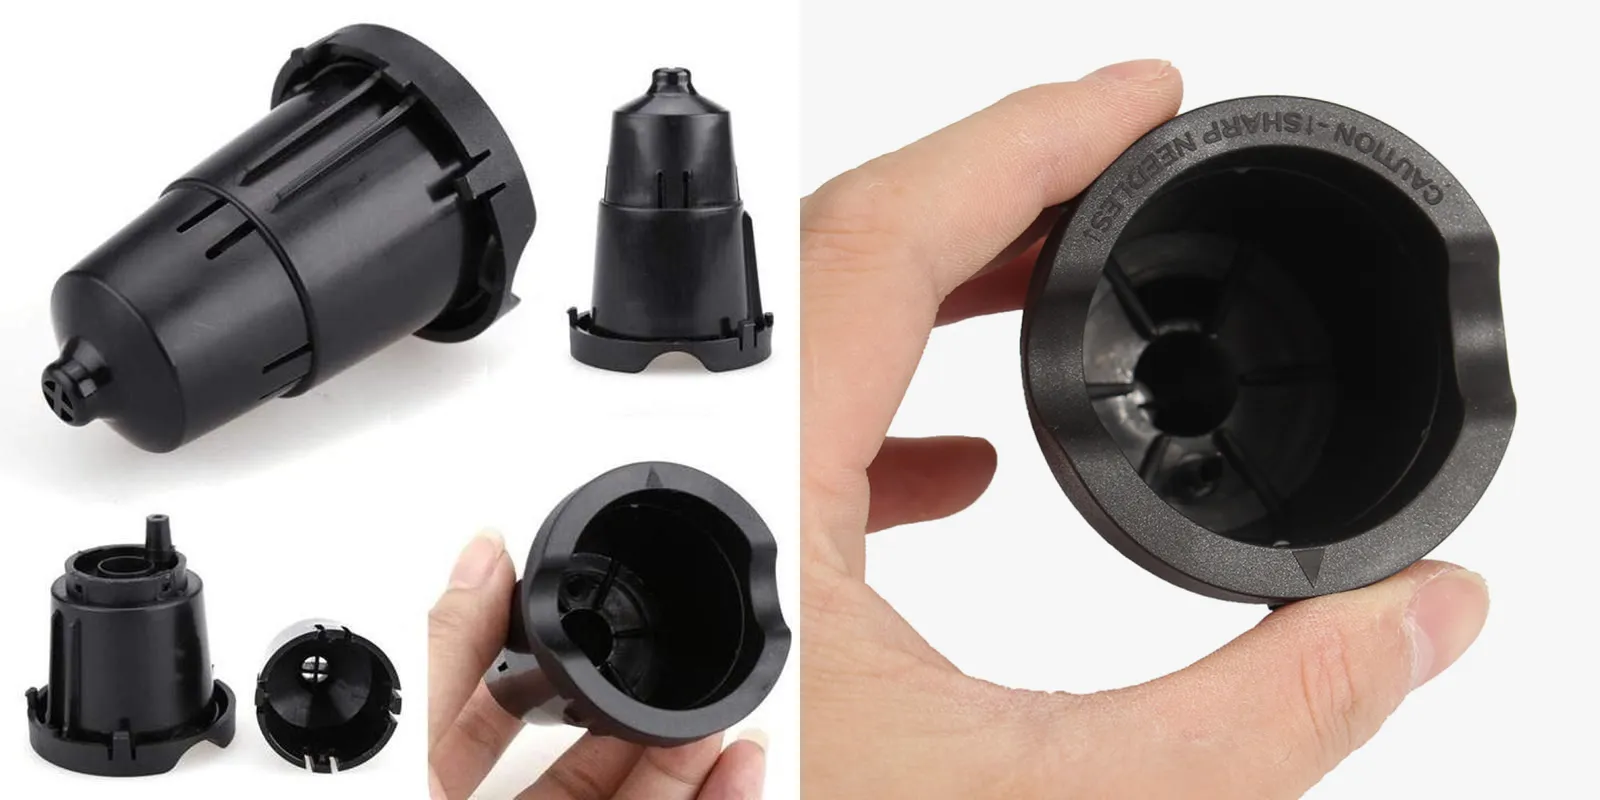
First, make sure your Keurig is unplugged and empty of any leftover water or K-cups. Next, remove the water reservoir and set it aside. Now it’s time to get down to business! Locate the needle assembly at the bottom of your Keurig where the K-cup holder goes. Using a paperclip or small tool, gently pry off the black plastic cover that sits on top of the needle assembly. Be careful not to damage any surrounding parts while doing this.
Step-by-Step Guide
- Unplug your Keurig and remove the reservoir.
- Locate the needle assembly inside the brewer.
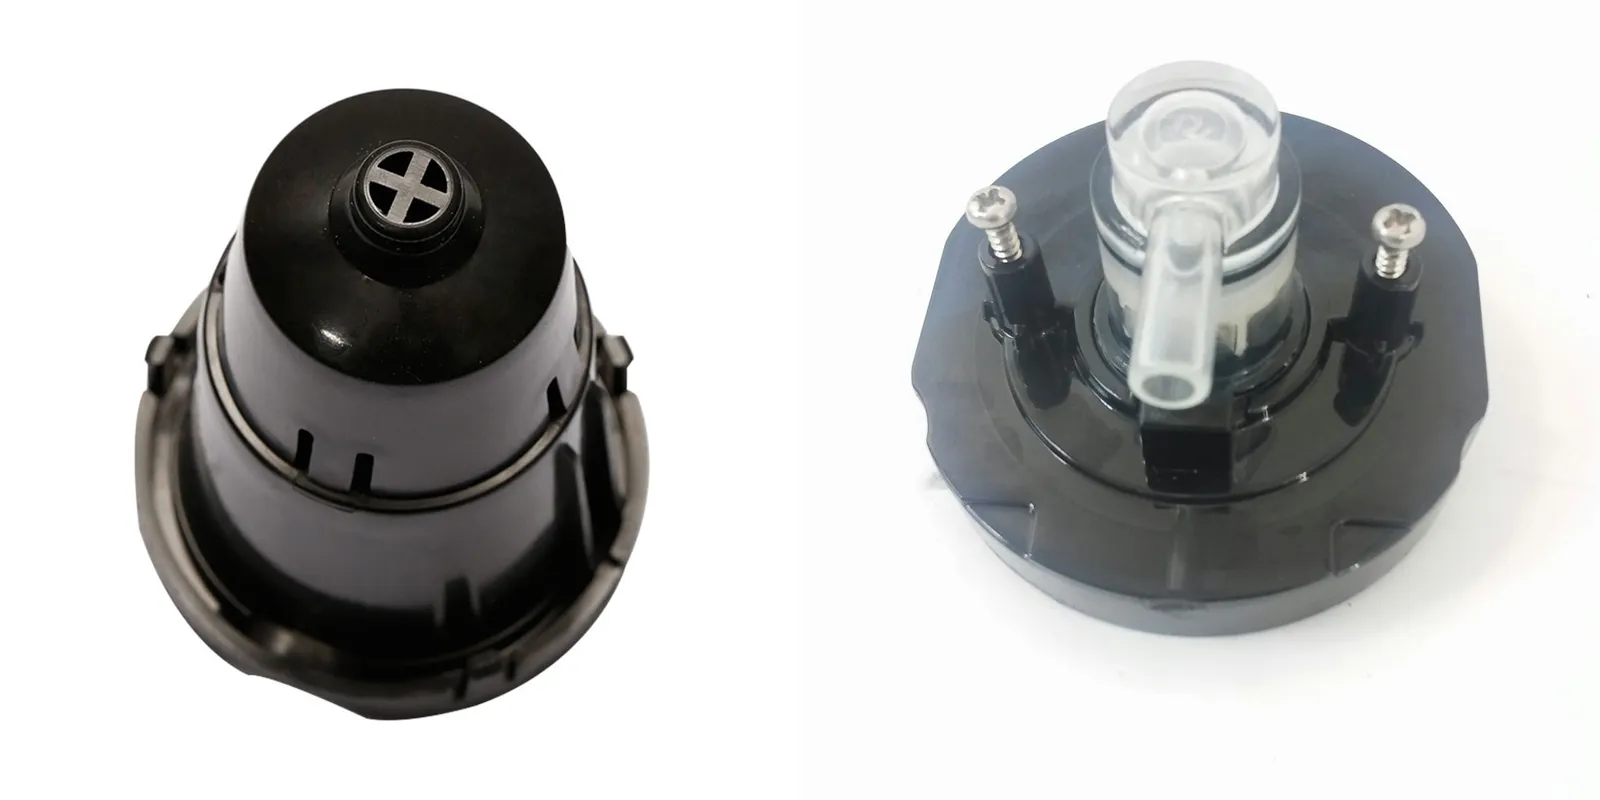
- Carefully remove the needle assembly by unscrewing the two screws on either side of it.
- Carefully remove the old needle from the assembly.
- Insert the new needle into the assembly and make sure it is securely in place.
- Re-screw the two screws on either side of the needle assembly to secure it in place.
- Replace the reservoir and plug the Keurig back in.
- Run a water-only cycle through the brewer to flush out any debris from the old needle.
Ensuring Proper Functioning Post-Replacement
Here are some tips about how to ensure proper functioning of a Keurig needle post-replacement:
- Proper Installation
- Clean the Needle
- Use Proper K-Cups
- Regular Maintenance
- Take it to a Professional
Keurig Replacement Parts Overview
Keurig Replacement Parts Listing
- Keurig Water Reservoir
- Keurig K-Cup Holder
- Keurig Water Filter
- Keurig Drip Tray
- Keurig Power Cord
- Keurig Needle Cleaning Tool
- Keurig Descaling Solution
- Keurig Brew Head
Steps to Finding the Right Keurig Replacement Parts
- Identify the Part You Need: The first step in finding the right Keurig replacement part is to identify the part that needs to be replaced. This can be done by examining the machine and looking for any signs of wear and tear or damage.
- Determine the Model Number: Once you have identified the part that needs to be replaced, you will need to determine the model number of your Keurig machine. This information can be found on the bottom of the machine or on the packaging.
- Research Replacement Parts: With the model number in hand, you can now begin researching replacement parts. Look for reputable online retailers that specialize in Keurig replacement parts. Be sure to read reviews from other customers to ensure that you are purchasing high-quality parts.
- Compare Prices: When comparing prices, be sure to take into consideration any shipping or handling fees. Some retailers may offer free shipping on larger orders or for certain products.
- Purchase the Replacement Part: Once you have found the right replacement part at an affordable price, go ahead and make your purchase. Be sure to review your order before checking out to ensure that you have selected the correct part and that all of your information is accurate.
- Install the New Part: Once your replacement part arrives, follow the manufacturer’s instructions for installation. If you are unsure about the installation process, consult the Keurig user manual or watch instructional videos online.
By following these steps, you can ensure that you find the right Keurig replacement parts for your machine and get it up and running like new again.
where to buy keurig replacement parts
Keurig’s Official Retailers
If you want to buy Keurig replacement parts, you can go ahead Keuirg’s official website. There are many parts you can purchase and extra service for you.
Third-Party Retailers
When it comes to purchasing Keurig replacement parts, there are many options available online. Third-party retailers like Amazon, Walmart, and Best Buy offer an extensive selection of high-quality replacement parts at affordable prices. You can find everything from needles to water filters and even carafes on these sites.
Best Online Retailers
When it comes to purchasing Keurig replacement parts, online retailers are good choice, you cna from Amazon, Walmart, Bed Bath & Beyond, Target and so on.
Keurig Needle Maintenance Tips
Importance of Regular Keurig Maintenance
Regular Keurig maintenance is important in order to ensure that your Keurig coffee maker is operating optimally. Keurig machines are designed to make coffee quickly and easily, and regular maintenance can help to ensure that your machine is providing you with the best possible result.
Regular maintenance helps to keep the machine clean, minimizes the risk of malfunction, and extends the life of the machine. Regular maintenance also helps to ensure that you are getting the best flavor and quality of coffee from your Keurig machine.
How to Clean Your Keurig Needle
If you are a coffee lover, then you know the importance of keeping your Keurig needle clean. A dirty needle can cause your machine to malfunction and produce poor quality coffee. Luckily, cleaning your Keurig’s needle is a simple process that can be done in just a few minutes.
To begin the cleaning process, unplug the machine from the power source and remove any remaining water from the reservoir. Next, carefully remove the K-cup holder and set it aside. You will then need to locate the needle that punctures the K-cup for brewing. Using a paperclip or toothpick, gently insert it into each hole of the needle to loosen any debris or buildup that may have accumulated.
When to Clean Your Keurig Needle
It is recommended to clean your Keurig needle at least once a month. This will help keep your machine running smoothly and allow it to make good-tasting coffee. If you notice any build-up of residue or scale around the needle, it is best to clean it right away.
Using Filtered Water to Prevent Keurig Needle Clogs
Using filtered water in your Keurig machine is a great way to prevent needle clogs. When you use tap water, minerals and other particulates can build up in the small parts of the machine, causing clogs. The filter in the water prevents these impurities from entering the machine and causing problems. Keeping your Keurig clean and using a filter will help to keep it running smoothly and prevent needle clogs.
Keurig Replacement Parts for Common Issues
Keurig Not Brewing: Identifying the Culprit Part
Here are some possible culprits if your Keurig is not brewing:
- Blocked Water Line: The most commonly occurring problem is the blocking of the water line. This can happen due to impurities in the water. The solution is to use filtered water or to run a descaling solution through the Keurig.
- Clogged Needle: The needle that punctures the K-Cup can sometimes become clogged with coffee grounds. This needle must be clear to allow water to pass through it properly. To clean the needle, you can use a small paper clip or needle to clear the clog.
- Mismatched Water Reservoir: The water reservoir must be properly seated on its base to ensure proper alignment with the Keurig. Sometimes, the reservoir can become misaligned, resulting in water not being able to reach the brewing chamber.
- Faulty Pump or Brew Head: A faulty pump or brew head can also cause the Keurig to not brew properly. This problem may require the replacement of a defective part.
- Power Supply: Sometimes the Keurig may not brew due to a power supply issue. Ensure that the Keurig is plugged in correctly and that the outlet is functioning correctly.
How to Replace a Broken Keurig Water Pump
- Unplug the Keurig from the power source and allow it to cool completely.
- Remove the water reservoir from the back of the Keurig.
- Locate the water pump underneath the reservoir.
- Disconnect the water tubing from the pump.
- Unscrew the mounting screws and remove the old pump.
- Install the new pump in the same way, reconnecting the water tubing.
- Reinstall the water reservoir and plug the Keurig back into the power source.
- Test the new pump by running a cycle of hot water through the machine.
Keurig Leaking Water: Replace These Keurig Parts
If your Keurig is leaking water, there are several parts that may need to be replaced. Here are some common parts that can cause water to leak from the machine:
- Water Reservoir: The water reservoir is the large plastic container where you pour the water. If the reservoir is cracked or damaged, it can leak water.
- O-Ring: The O-ring is a small rubber ring that seals the water reservoir to the brewer. If the O-ring is worn or damaged, water can leak out.
- Brew Head: The brew head is the metal component that punctures the K-cup and brews the coffee. If the brew head is damaged or warped, it can cause water to leak from the machine.
- Exit Needle: The exit needle is a small metal pin that punctures the bottom of the K-cup during brewing. If the exit needle is clogged or damaged, water can leak out.
- Drip Tray: The drip tray is the plastic tray that catches any excess water or coffee. If the drip tray is overflowing, it can cause water to leak from the machine.
Replacing these parts can help resolve the issue of a leaking Keurig. If you are unsure how to replace the parts or the issue persists, it is recommended to contact Keurig customer service or a professional repair technician.
Conclusion
Whether you’re replacing the Keurig needle for the first time or are a seasoned expert, this guide will provide all the information you need to make sure your Keurig continues to make the perfect cup of coffee. With the right parts and the right instructions, you’ll be able to get your Keurig back to brewing the perfect cup in no time.