
We will take a detailed look at the Keurig 2.0 parts diagram schematic here. The Keurig 2.0 is a coffee maker that is revolutionizing the way people make coffee. Its innovative design and advanced technology make it one of the most popular coffee makers on the market.
Plus, we will also examine each component of the diagram, as well as how they are connected to each other and the overall functioning of the machine.
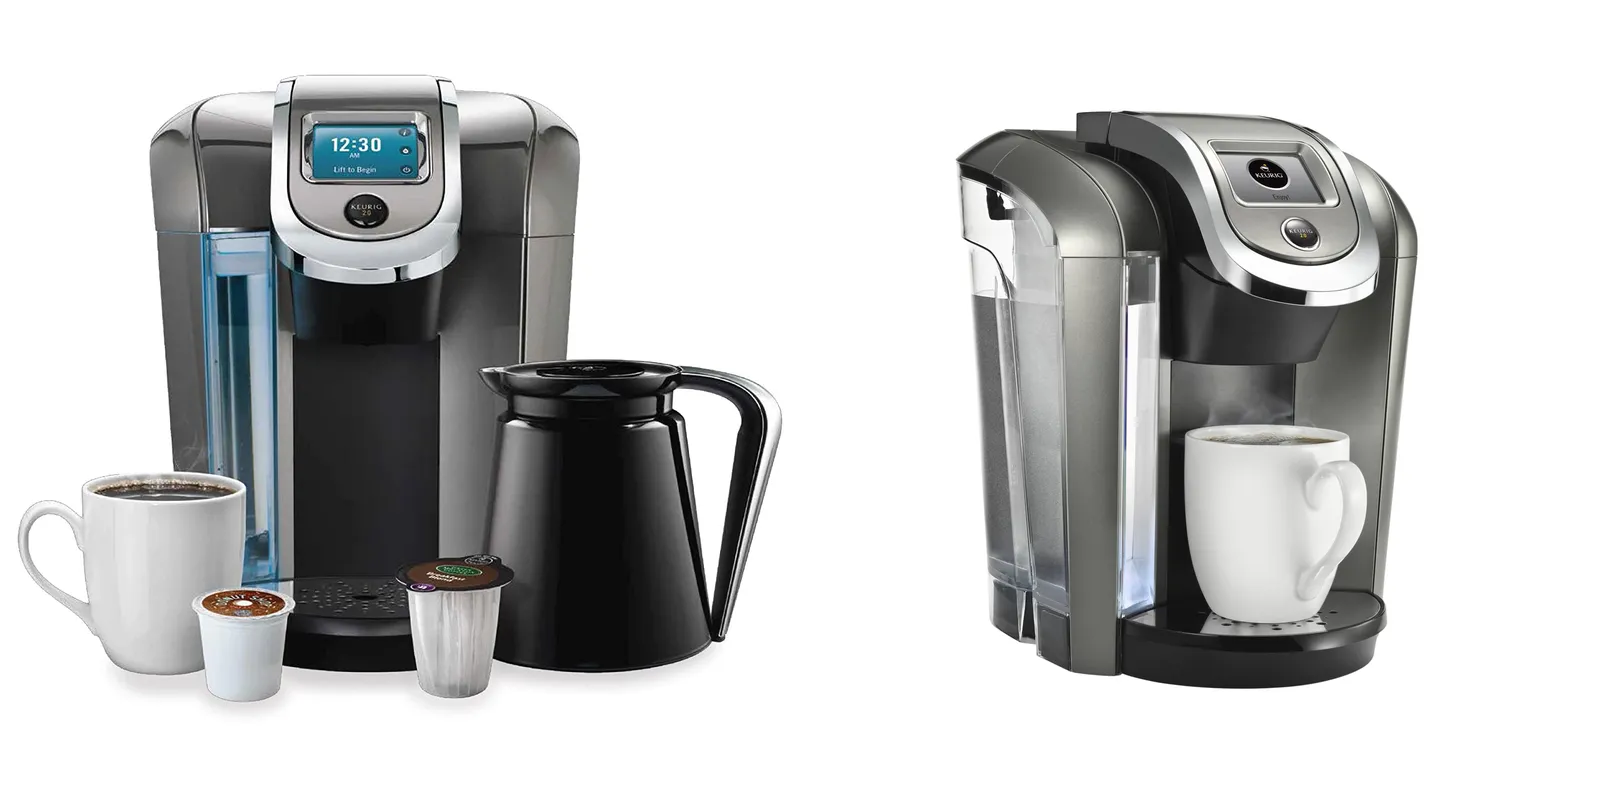
Keurig 2.0
Introduction and its popularity
Keurig 2.0 is a new coffee maker that has made a lot of waves in the coffee industry recently. It was first released in 2016 and has since been popular with coffee lovers all over the world.
Keurig 2.0 is an updated and revamped version of the original Keurig coffee maker from 2008-2016. It features many new features, including automatic water brewing and cleaning, multiple brew cycles, programmable Cleansing Controls, an LCD screen for navigating your recipes, and more. The Keurig 2.0 also comes with a variety of accessories to make your experience even better, such as filters and brewers.
Keurig 2.0 Parts
The importance of Keurig 2.0 parts diagram schematic
The Keurig 2.0 parts diagram schematic is one of the most important aspects to understand when it comes to using the coffee maker. Without understanding this information, it can be difficult to troubleshoot and fix issues with your coffee maker.
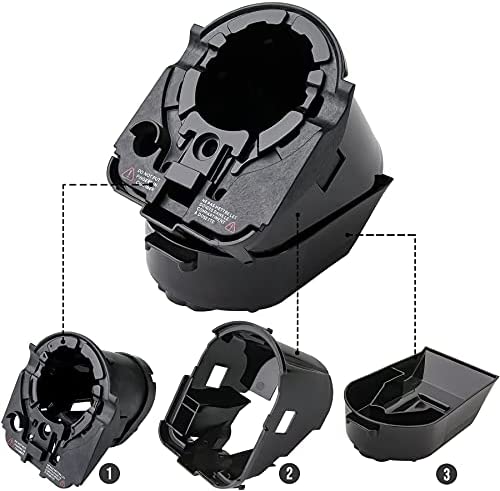
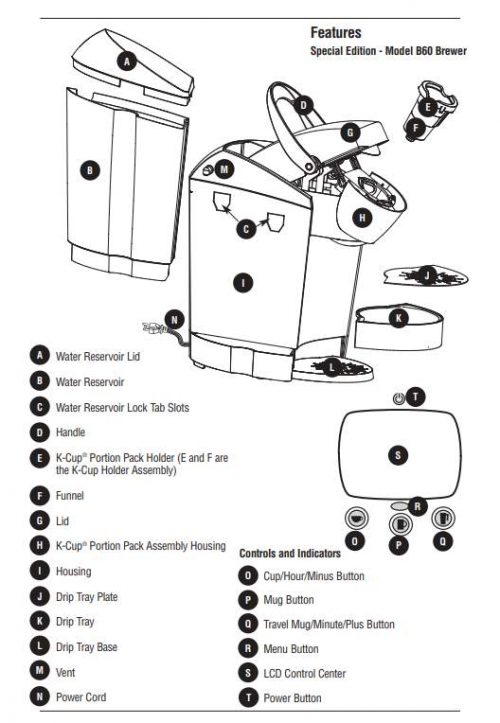
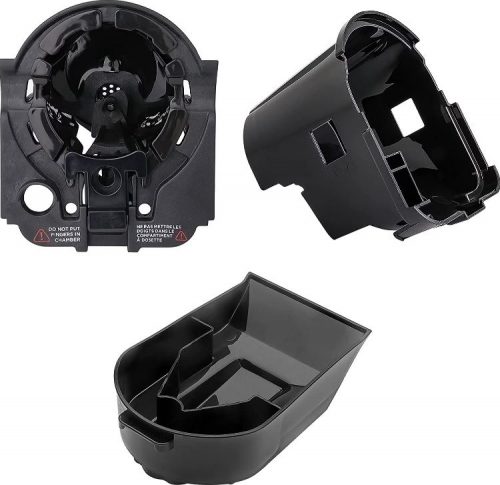
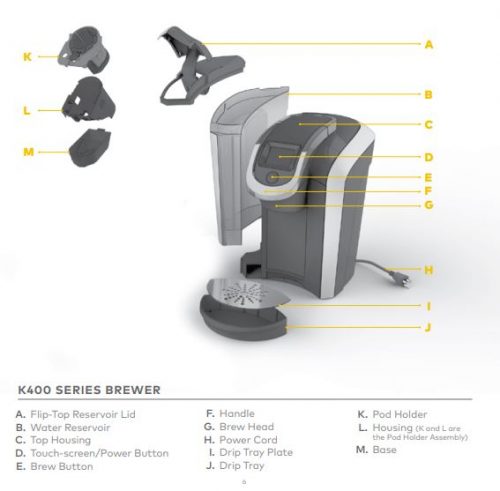
Different Keurig 2.0 parts and their functions
- K-Cup Pod Holder: This is the part that holds your K-Cup pods in place.
- Water Reservoir: This is the part that holds the water used to make your coffee.
- Brew Head: This is the part that forces the hot water through the K-Cup pod to make your coffee.
- Carafe: This is the part that holds the brewed coffee after it is brewed.
- K-Cup Pod Ejector: This is the part that ejects the empty K-Cup pod after it has been used.
- Control Panel: This is the part that allows you to adjust settings such as the strength and size of your coffee.
- Drip Tray: This is the part that catches any spills or drips from the brewing process.
parts diagram schematic
Keurig 2.0 parts Diagram

Keurig 2.0 Cup Holder Parts Diagram
Keurig 2.0 K200 Parts Diagram
Keurig 2.0 Replacement Parts Needle Diagram
Keurig 2.0 400 Parts Diagram
How each part is important for the overall functioning of Keurig 2.0?
- Water Reservoir: The water reservoir is the main component of the Keurig 2.0, as it stores the water needed to brew a cup of coffee. Without the water reservoir, the machine would not be able to make any coffee.
- K-Cup Pod Holder: The K-Cup pod holder is a part of the Keurig 2.0 that holds the K-Cup pod that contains the coffee grounds. This is necessary for the machine to be able to make coffee, as the K-Cup pod needs to be inserted into the holder in order for the machine to start brewing.
- Brewing System: The brewing system is the part of the Keurig 2.0 that actually brews the coffee. Without the brewing system, the machine would not be able to make any coffee.
- Water Pump: The water pump is the part of the Keurig 2.0 that pumps the water from the water reservoir to the brewing system. Without the water pump, the machine would not be able to make any coffee.
- Control Panel: The control panel is the part of the Keurig 2.0 that allows the user to control the settings of the machine, such as the temperature and the size of the cup. Without the control panel, the machine would not be able to make any coffee.
Troubleshooting 2.0 Keurig
Issue 1: Water is not being dispensed
- Check to make sure the water tank is full and correctly inserted.
- Check to see if the water filter needs to be replaced. Check the water line for any blockages.
Issue 2: Brewer isn’t turning on
- Make sure the power cord is plugged in and switched on.
- Check the circuit breaker and reset it if necessary.
- Check the outlet to make sure it is working.
Issue 3: Coffee is not hot enough
- Check to make sure the water temperature is set to the desired temperature.
- Check to make sure the water tank is full and correctly inserted.
- Clean the machine according to the manufacturer’s instructions.
- Descale the machine according to the manufacturer’s instructions.
Issue 4: Coffee is not strong enough
- Check to make sure you are using the correct amount of coffee grounds for the cup size.
- Check to make sure the water has been heated to the proper temperature.
- Clean the machine according to the manufacturer’s instructions.
How to maintain Keurig 2.0 parts?
- Clean the Keurig 2.0 parts regularly. Clean the exterior of the machine with a damp cloth and wipe down the surface on a regular basis.
- Clean the K-cup holder, lid, and needle with a damp cloth and mild detergent. Rinse and dry thoroughly before reassembling.
- Descale the machine every 3-4 months.
- Replace the water filter every 2 months.
- Replace the K-cup holder lid when it shows signs of wear and tear.
- Replace the needle if it becomes clogged.
- Make sure to use the correct amount of water when brewing coffee or tea.
- Avoid using harsh detergents or solvents when cleaning the machine.
The End
By understanding the Keurig 2.0 parts diagram schematic, it will be easier to troubleshoot any issues that may arise with the machine. It is important to know the inner-workings of the Keurig 2.0 in order to properly maintain and care for the machine. With this knowledge, you will be able to keep your Keurig 2.0 running smoothly and making delicious coffee for years to come.