
If you are a coffee lover and own a Keurig 2.0 coffee maker, then you must know how important the cup holder parts are for brewing a perfect cup of coffee. Whether it is the K-Cup, K-Mug, or K-Carafe cup holder, it is essential to understand their functions. In this article, we will provide you with everything you need to know about the Keurig 2.0 cup holder parts diagram.
Keurig 2.0 Cup Holder Parts
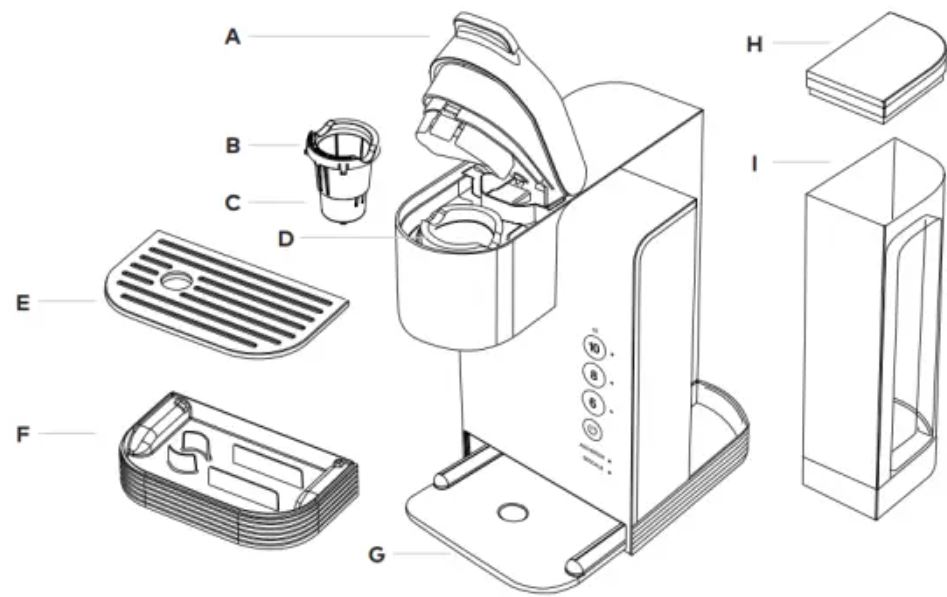
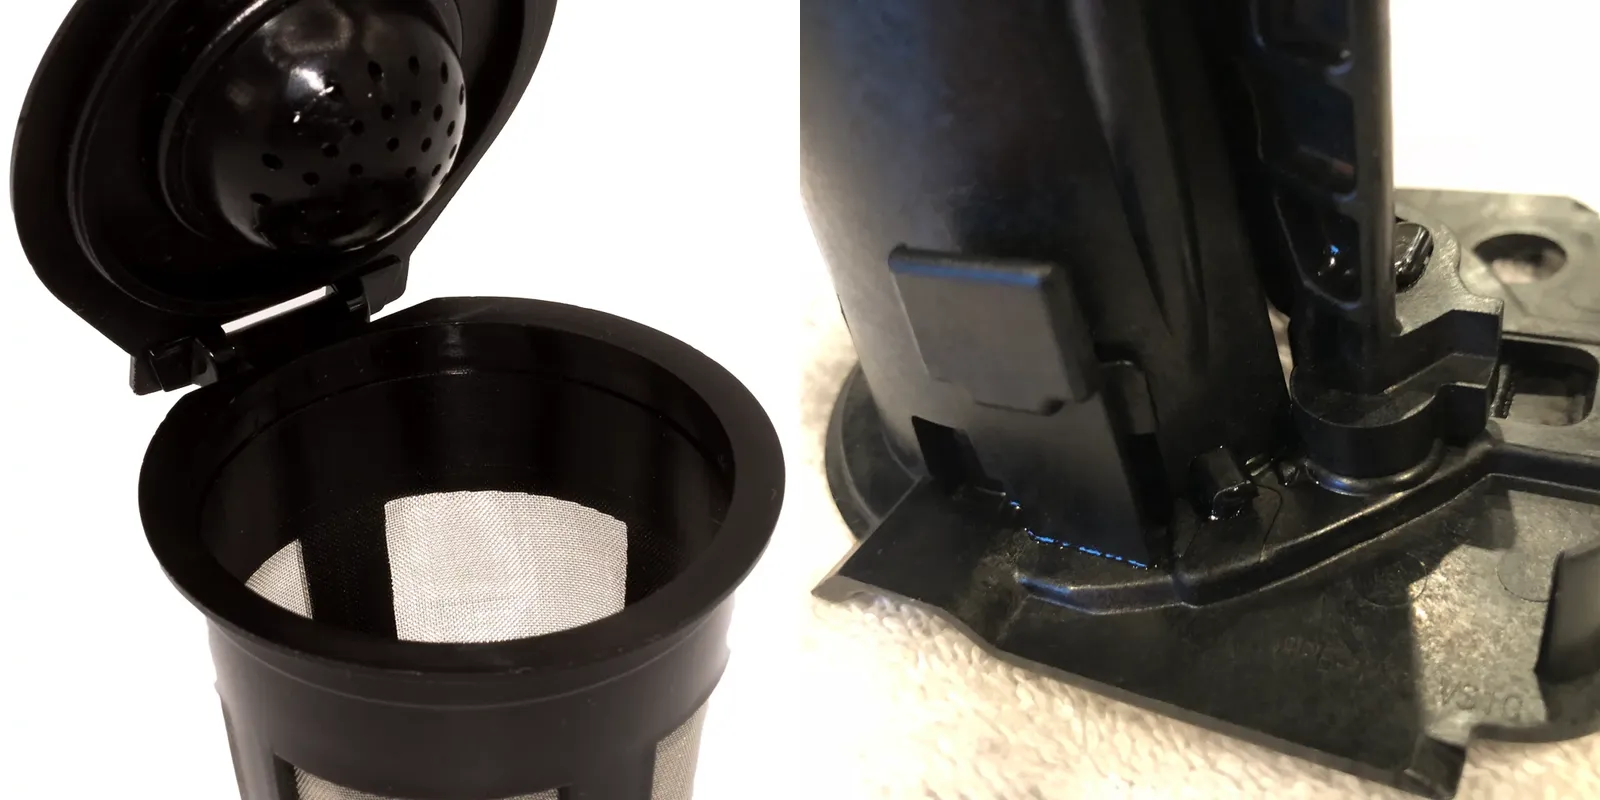
Keurig 2.0 Cup Holder Parts are a set of components used in Keurig 2.0 brewing systems. These parts include the cup holder assembly, drip tray assembly, and the cover. The cup holder assembly is responsible for holding the K-cup pods in place during the brewing process. The drip tray assembly is designed to catch any spilled coffee or water during the brewing process, preventing any mess or damage to your countertops.
The cover, on the other hand, provides protection to the cup holder and drip tray assembly. It keeps the components safe and prevents them from getting damaged or contaminated. These components are made of high-quality materials, which makes them durable, long-lasting, and dependable.
If any of the Keurig 2.0 Cup Holder Parts become damaged or broken, they can be easily replaced by purchasing a new assembly from the manufacturer. The parts are easy to install and take just a few minutes to replace. In conclusion, Keurig 2.0 Cup Holder Parts are essential components that help ensure your brewing system functions optimally, providing you with the best coffee experience.
Keurig 2.0 Cup Holder Parts Diagram
Keurig 2.0 Cup Holder Assembly
Instructions for assembling
- Remove the old cup holder from the coffee maker by gently pulling it out.
- Identify the cup holder parts you need to assemble, either the K-Cup, K-Mug or K-Carafe cup holder.
- Align the cup holder parts in their appropriate slots in the coffee maker.
- Gently push the cup holder parts into place, making sure that they click securely into their designated slots.
- Turn on the coffee maker and test the functionality of the cup holder parts to ensure that they work correctly.
Tips and Tricks for assembling
- Before assembling the cup holder parts, make sure you have all the necessary parts and tools on hand.
- Take your time when assembling the cup holder parts to avoid any damage or improper fitting.
- Ensure that the cup holder parts are clean and free from any debris or dirt before assembling.
- If you are having trouble fitting the cup holder parts, do not force them as this may cause damage to the coffee maker.
- If you are unsure about assembling the Keurig 2.0 Cup Holder Parts correctly, consult the manufacturer’s manual or seek professional help.
Troubleshooting the Keurig 2.0 Cup Holder
Common issues
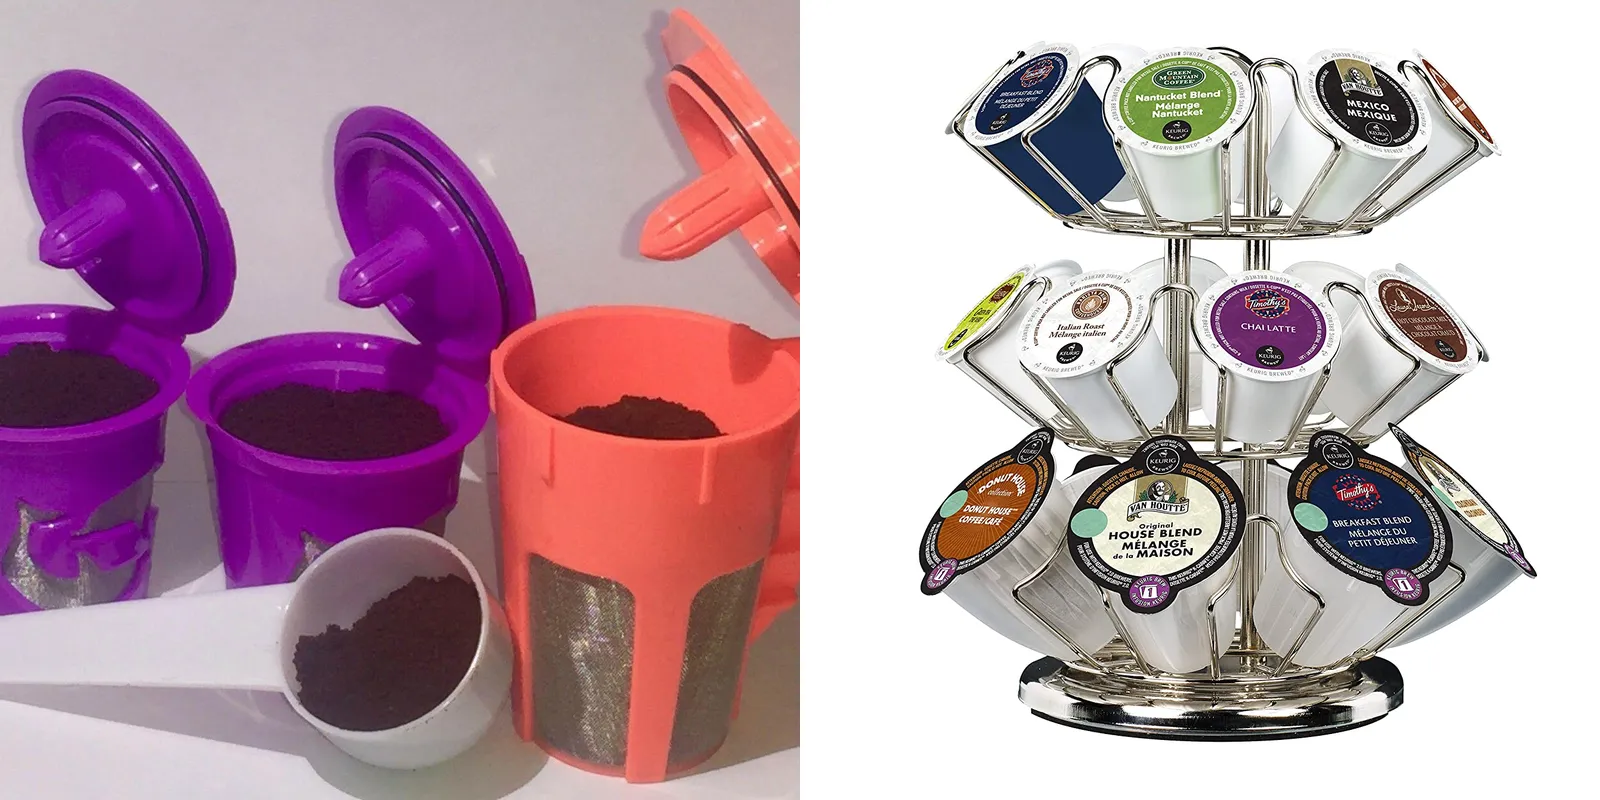
The Keurig 2.0 Cup Holder is known to have issues with holding the K-Cups in place during brewing. The most common problem is that the K-Cup will fall out of the holder during the brewing cycle, causing a mess and potentially damaging the machine. Another issue is that the K-Cup may not be able to fit in the holder, or the holder may become stuck and difficult to remove.
Solutions
One common solution is to clean the cup holder thoroughly and ensure that it is dry before using it again. If the cup holder is damaged or broken, it may need to be replaced. Another solution is to try using a different brand of K-Cup, as some brands may be too small and not fit properly in the holder.
Replacing the Keurig 2.0 Cup Holder Parts
When to Replace
The Keurig 2.0 Cup Holder should be replaced if it is damaged, cracked, or broken. If the K-Cups are falling out of the holder or not staying securely in place during brewing, it may also be time to replace the part. In general, it is a good idea to inspect the cup holder regularly to ensure that it is functioning properly.
Step-by-Step Guide
To replace the Keurig 2.0 Cup Holder, follow these steps:
- Turn off and unplug the Keurig 2.0 machine.
- Remove the water reservoir and the drip tray from the machine.
- Locate the cup holder and remove it from the machine.
- Insert the new cup holder and ensure that it is securely in place.
- Replace the drip tray and water reservoir.
- Plug in the machine and turn it on to test the new cup holder.
Maintaining the Keurig 2.0 Cup Holder Parts
Cleaning tips
To clean the Keurig 2.0 Cup Holder, follow these steps:
- Remove the cup holder from the Keurig 2.0 machine.
- Rinse the cup holder under hot water to remove any debris or residue.
- Use a damp cloth or sponge to wipe down the cup holder, paying special attention to any crevices or hard-to-reach areas.
- Dry the cup holder thoroughly with a clean towel or let it air dry completely.
- Reinsert the cup holder into the Keurig 2.0 machine.
Maintenance Schedule
To maintain the Keurig 2.0 Cup Holder, it is recommended to clean it regularly after use, especially if it becomes dirty or clogged with residue. It is also a good idea to inspect the cup holder for any cracks, damage, or signs of wear and tear, and replace it if needed. Additionally, using high-quality K-Cups that fit properly in the holder can help prevent problems with the cup holder in the future.
Summary
Assembling the cup holder parts of your Keurig 2.0 coffee maker can be challenging. However, with the right instructions and tips, you can easily do it yourself. By understanding the function and features of the cup holder parts, you can ensure that your coffee maker is working efficiently and producing a perfect cup of coffee every time.